Apple App Store Deployment Guide
Latest
This guide provides a step-by-step overview
of deploying your Flutter application
to the Apple App Store.
Follow these instructions to configure,
build, and publish your iOS application successfully.
Prerequisites
Before starting the iOS deployment process,
ensure you have:
- Apple Developer Account ($99/year)
- Your Flutter application ready for release
- Mac computer with Xcode installed
-
Required application assets:
- App Icon (1024 × 1024 px)
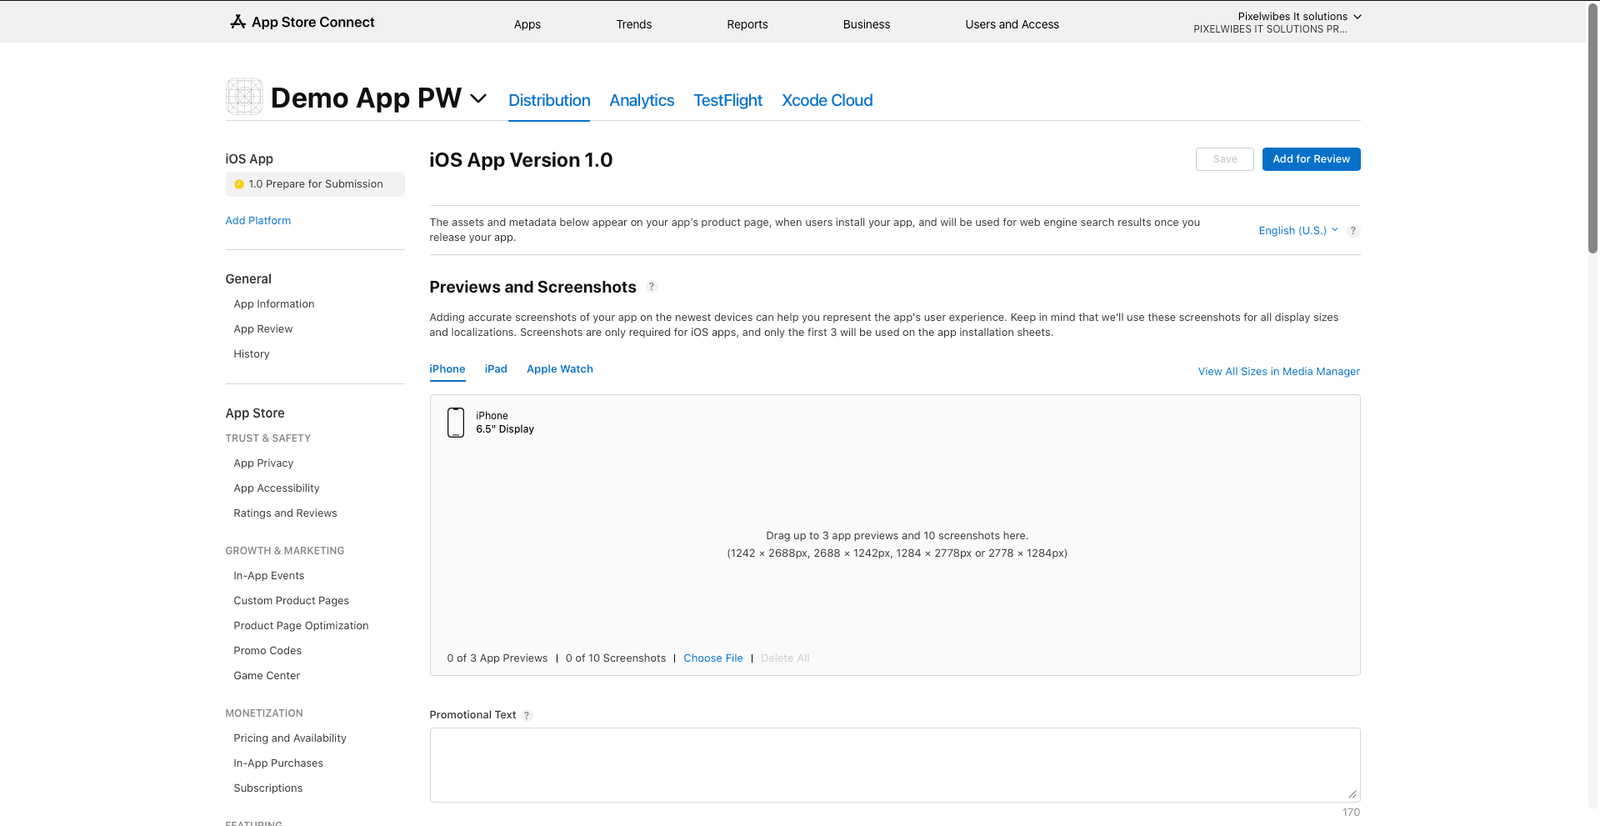
- iPhone Screenshots
- iPad Screenshots (if supported)
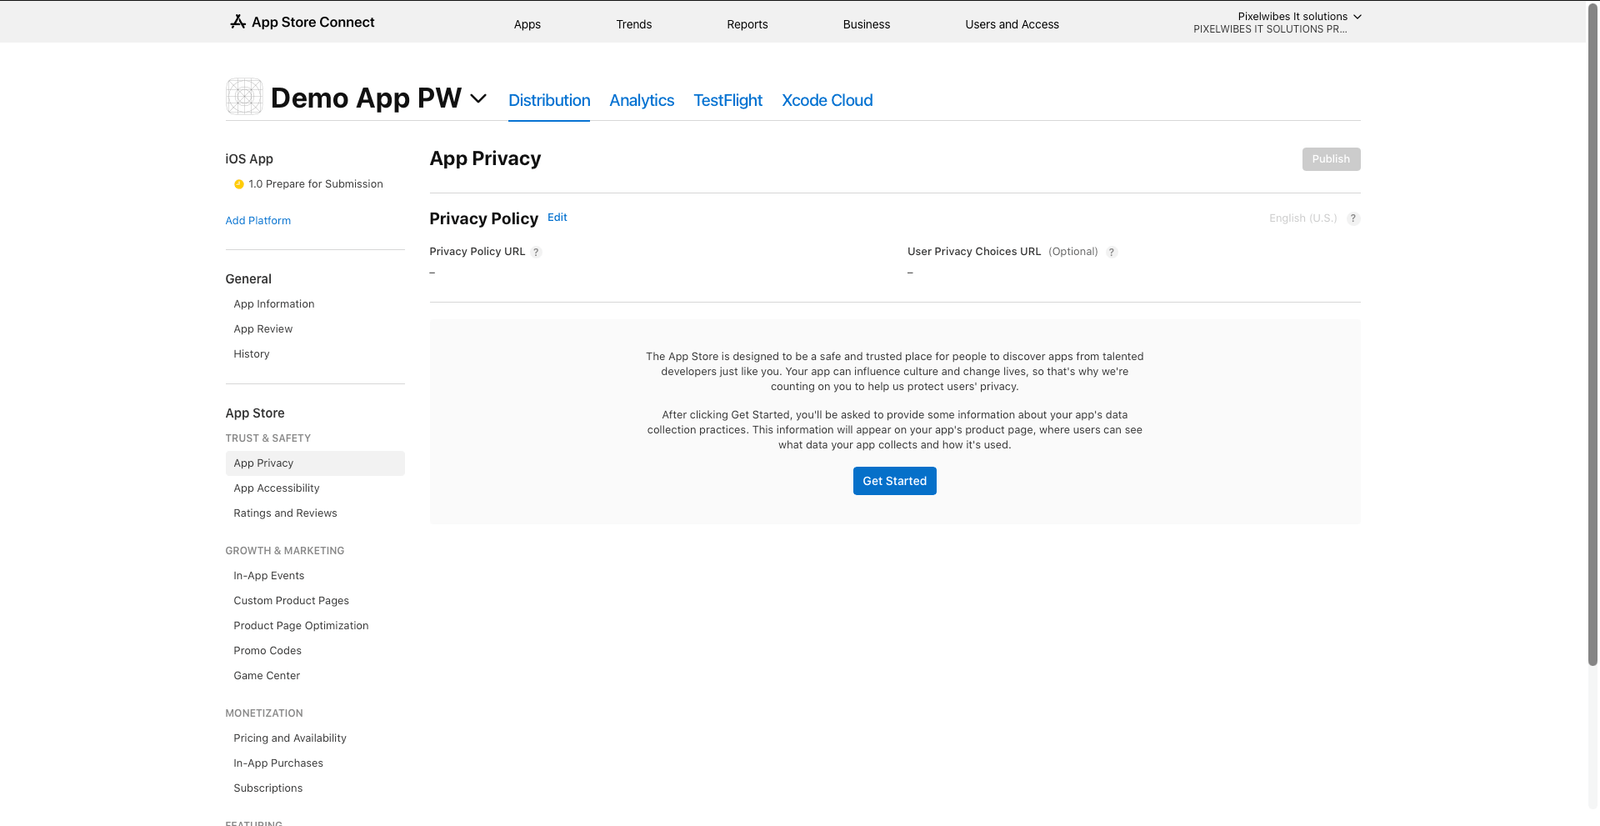
- Privacy Policy URL
- Application Description
- Keywords
- Support URL
- Marketing URL (Optional)
- App Store Connect account setup
Deployment
This section provides detailed instructions
for deploying your Flutter application
to the Apple App Store.
Follow each step carefully to ensure
a successful iOS deployment and App Store submission.
Step 1: Developer Account Setup
Visit Apple Developer Program and complete
your Apple Developer account setup process.
Enroll in Apple Developer Program
- Visit Apple Developer Program
- Sign in using your Apple ID
- Enroll in the developer program
- Pay the $99 annual developer fee
- Complete organization verification
- Set up payment profile
- Provide contact information
Configure App Store Connect
- Create App Store Connect account
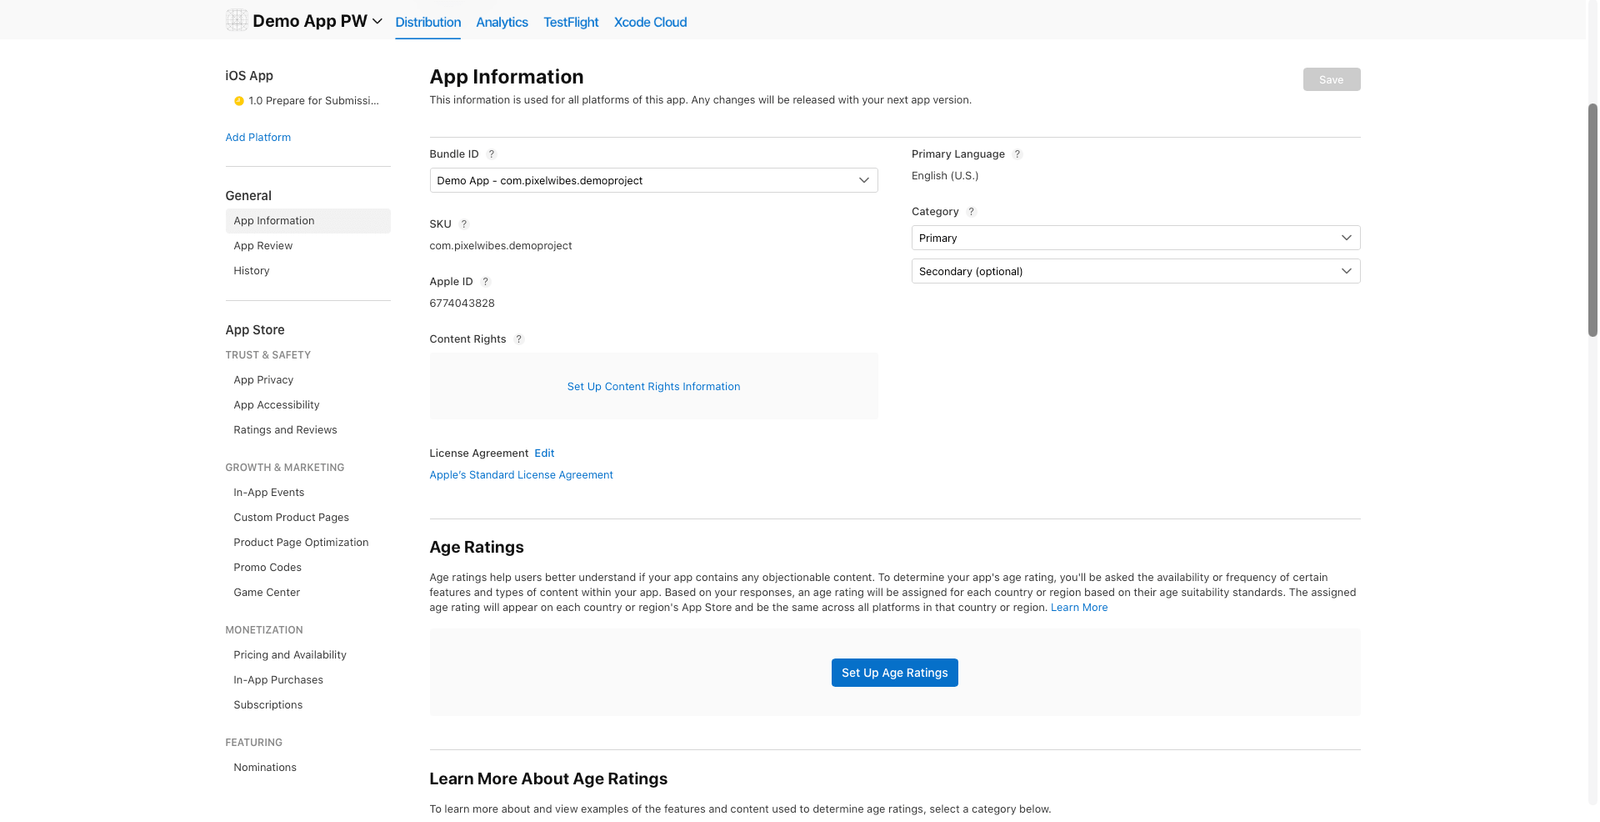
- Create application record
- Configure basic application information
- Configure required application capabilities
Note:
Apple Developer account verification may take additional time
depending on your account type and region.
Step 2: App Configuration
Before building your Flutter application,
update all required configuration files.
Update pubspec.yaml
Open the following file:
pubspec.yaml
Update the application version:
Important Version Note:
-
Version format:
version_name+version_code
-
Example:
1.0.0+1
-
version_name is displayed publicly to users
-
version_code is used internally by App Store
-
Always increase the build number
for every new release
Example Version Sequence
First release:    1.0.0+1
Bug fix update:  1.0.1+2
Feature update:  1.1.0+3
Major update:    2.0.0+4
Step 3: Generate App Signing Certificate
Open Xcode and configure your Apple Developer certificates.
- Open Xcode
- Go to Xcode → Settings → Accounts
- Add your Apple ID
- Create Development Certificate
- Create Distribution Certificate
Provisioning Profiles
- Create Development Provisioning Profile
- Create App Store Provisioning Profile
Important:
- Keep certificates secure
- Keep provisioning profiles secure
- Backup all signing certificates
- Required for future updates
Step 4: Build Your App
Open terminal in your Flutter project root directory
and execute the following command:
flutter build ipa --release
Optional Build Flags
--obfuscate
 --split-debug-info
-
--obfuscate helps protect your source code
-
--split-debug-info helps improve crash reporting
Note:
Wait for the build process to complete successfully
before uploading the IPA file.
Find IPA file at
build/ios/ipa/YourApp.ipa
Step 5: App Store Connect Setup
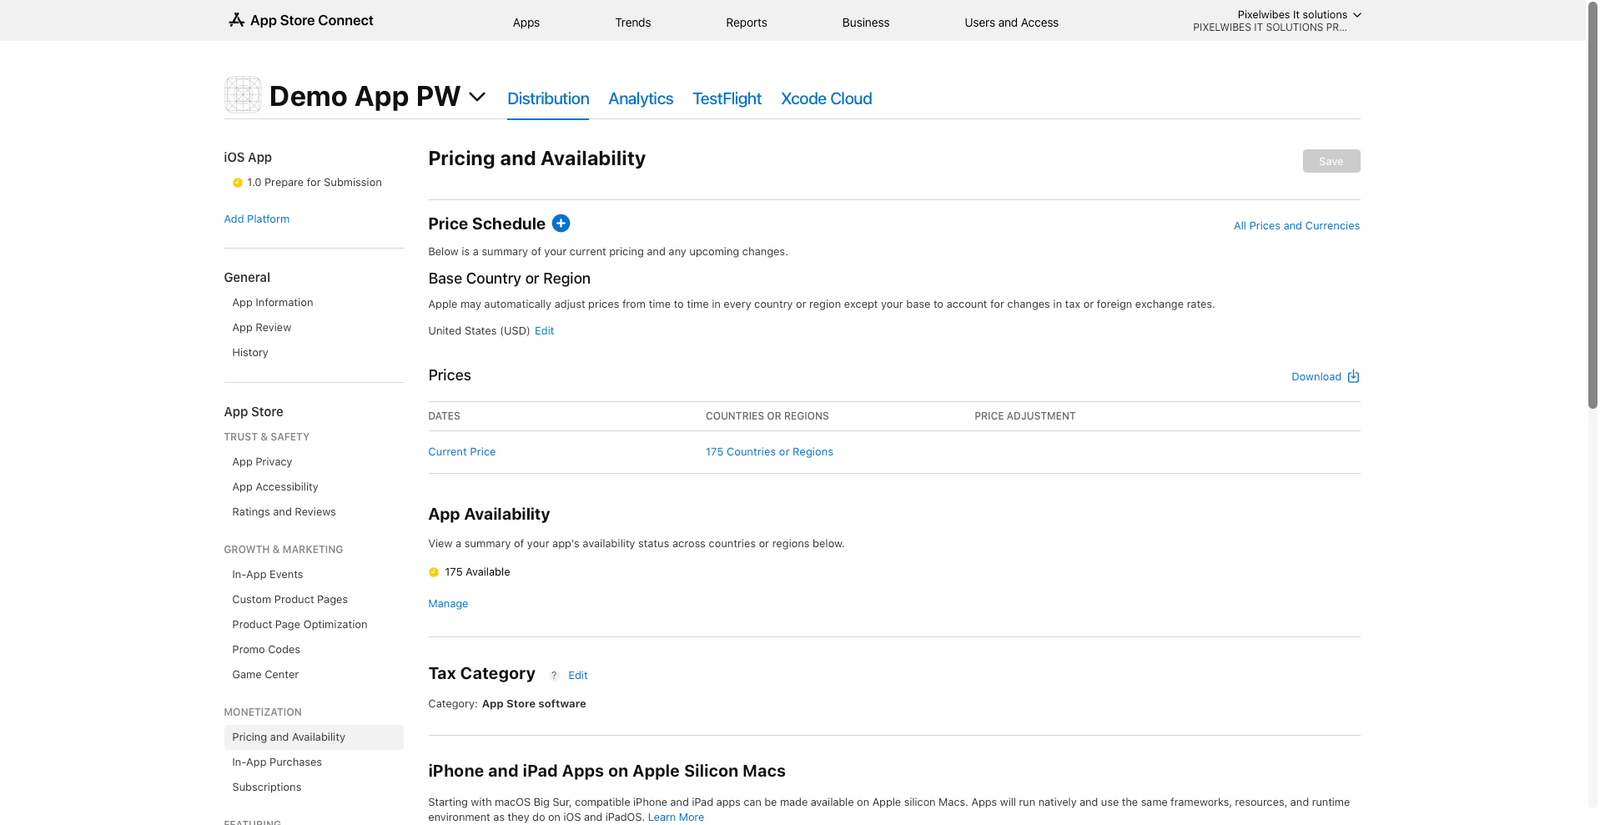
Configure your application inside App Store Connect
before uploading the iOS release build.
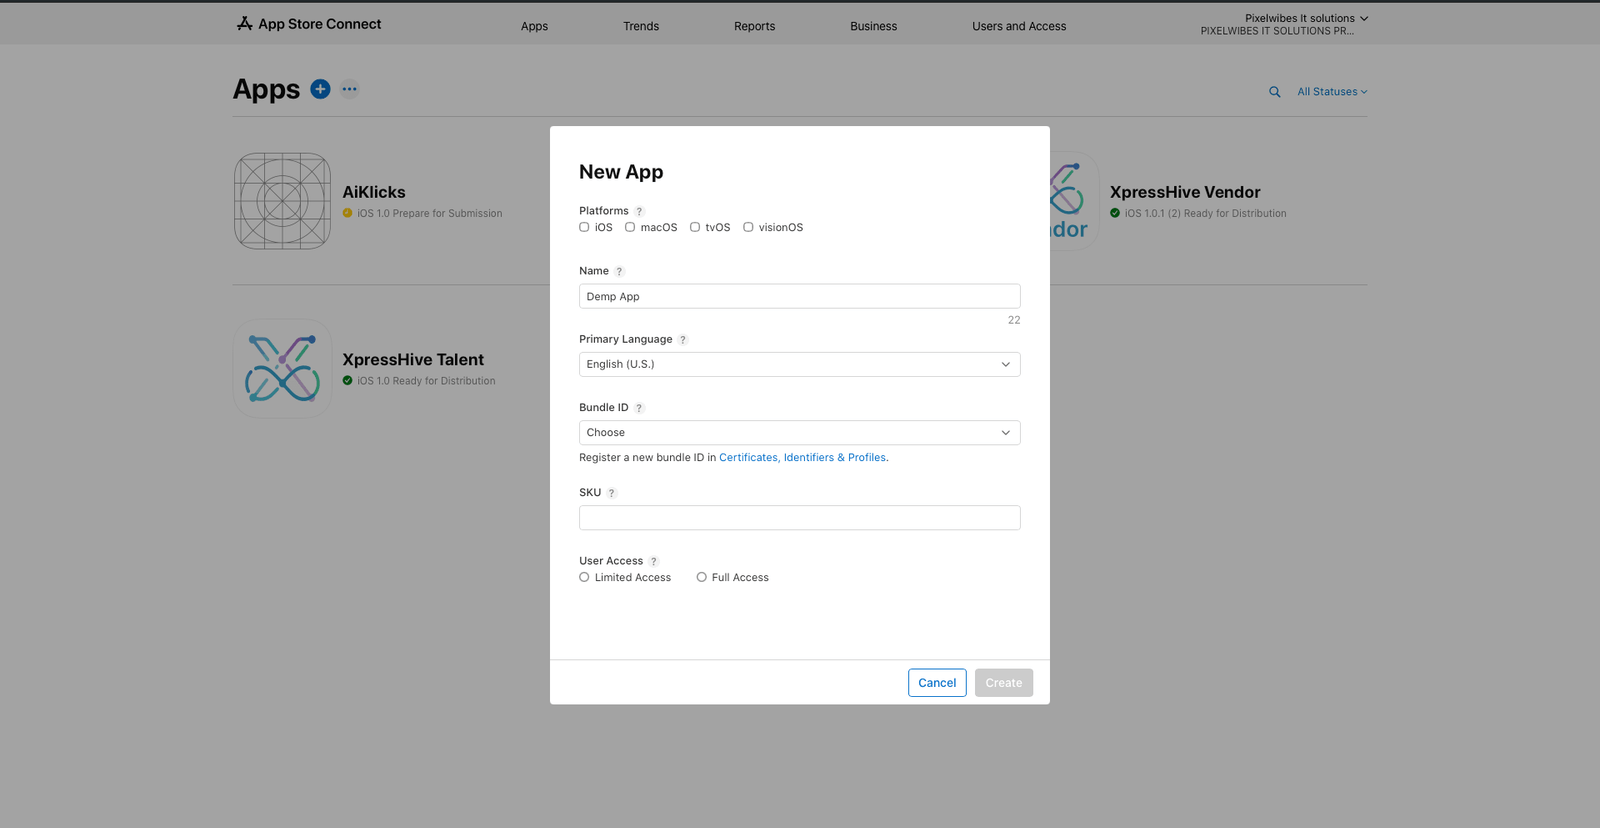
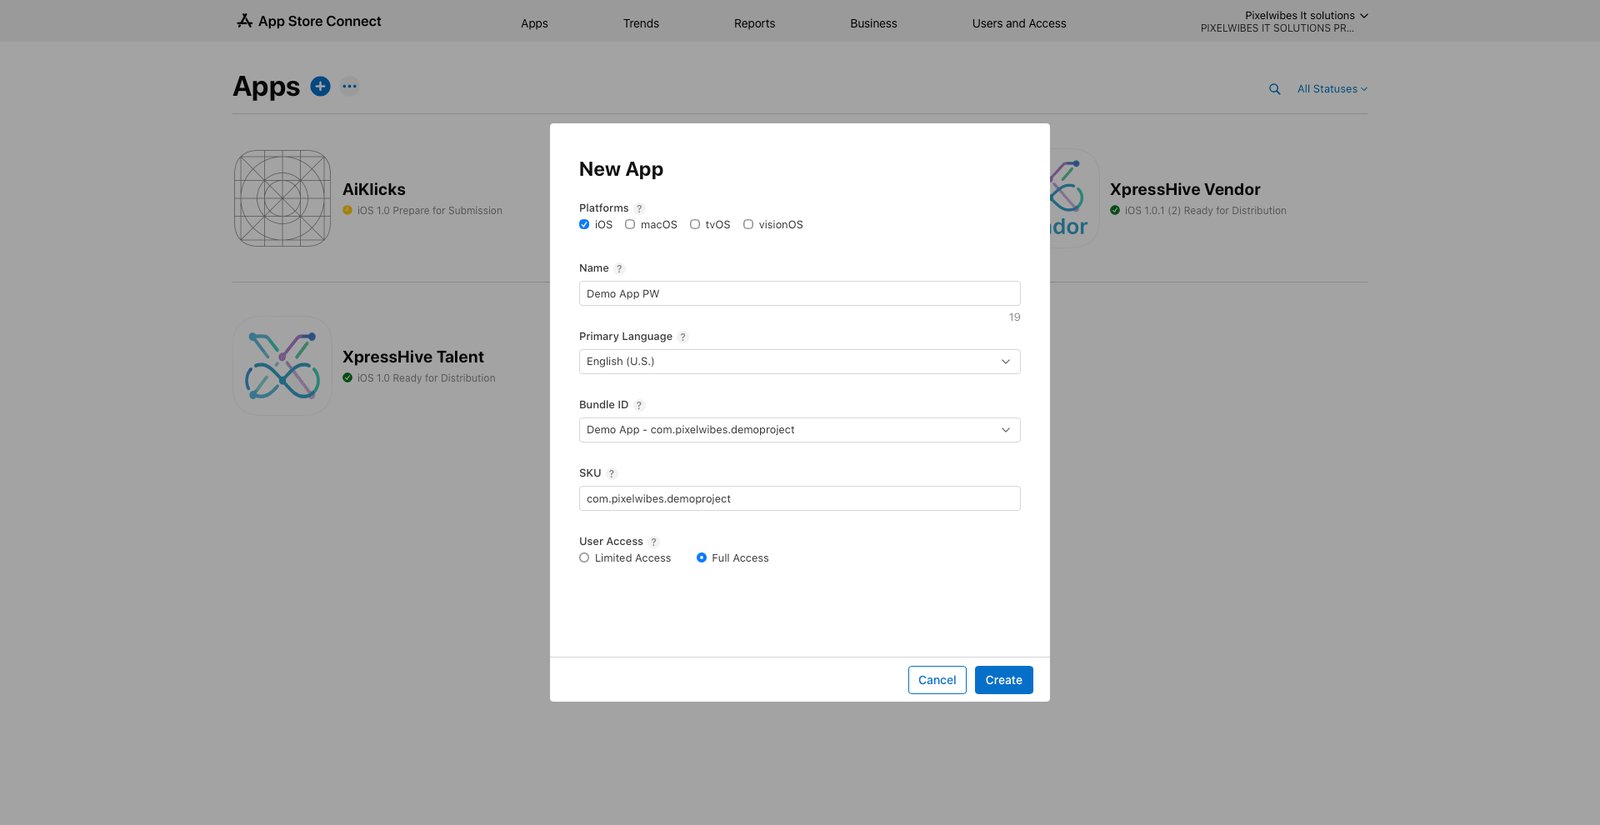
Create App Record
- Log in to App Store Connect
- Click My Apps
- Click + to create a new application
- Fill all required application information
Basic Application Information
- Application Name
- Bundle ID
- SKU
- User Access
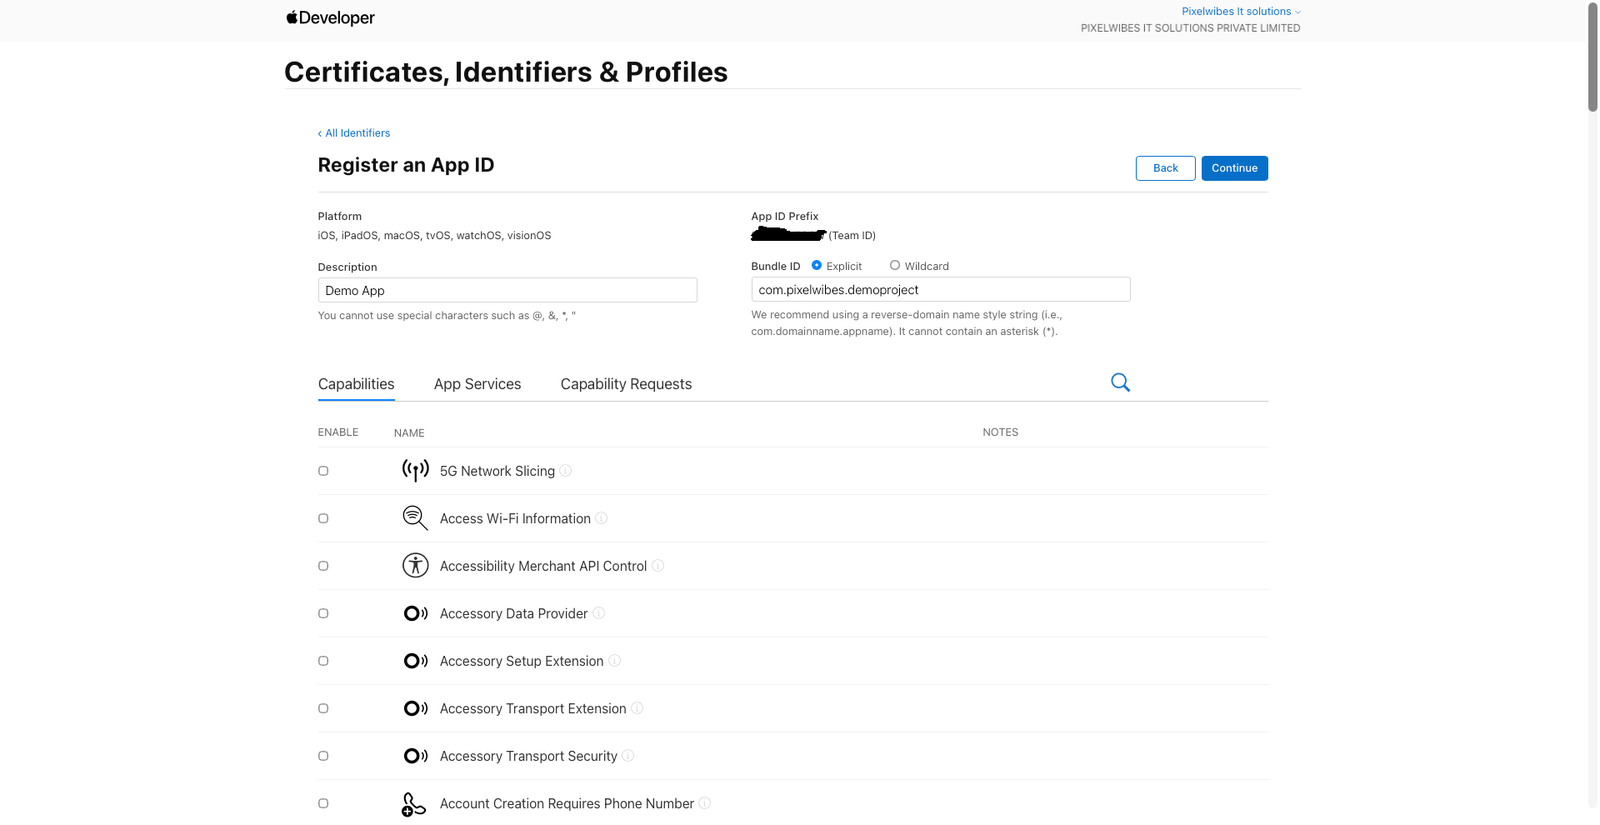
Bundle Identifier Configuration
Choose an existing Bundle ID
or create a new Bundle Identifier.
Note:
Bundle ID creation can also be configured automatically
through Xcode by enabling automatic signing
inside project settings.
- Open Apple Developer Portal
- Go to Certificates, Identifiers & Profiles
- Open the Identifiers section
- Click + to register a new Bundle ID
- Enter a unique Bundle Identifier
- Select required application capabilities
- Register the Bundle ID
Bundle ID Format
com.companyname.appname

Example:
com.example.myapp
Important:
Use the same Bundle Identifier
in both Xcode and App Store Connect.
Step 7: Production Release
Open the iOS project in Xcode
and prepare the application for App Store submission.
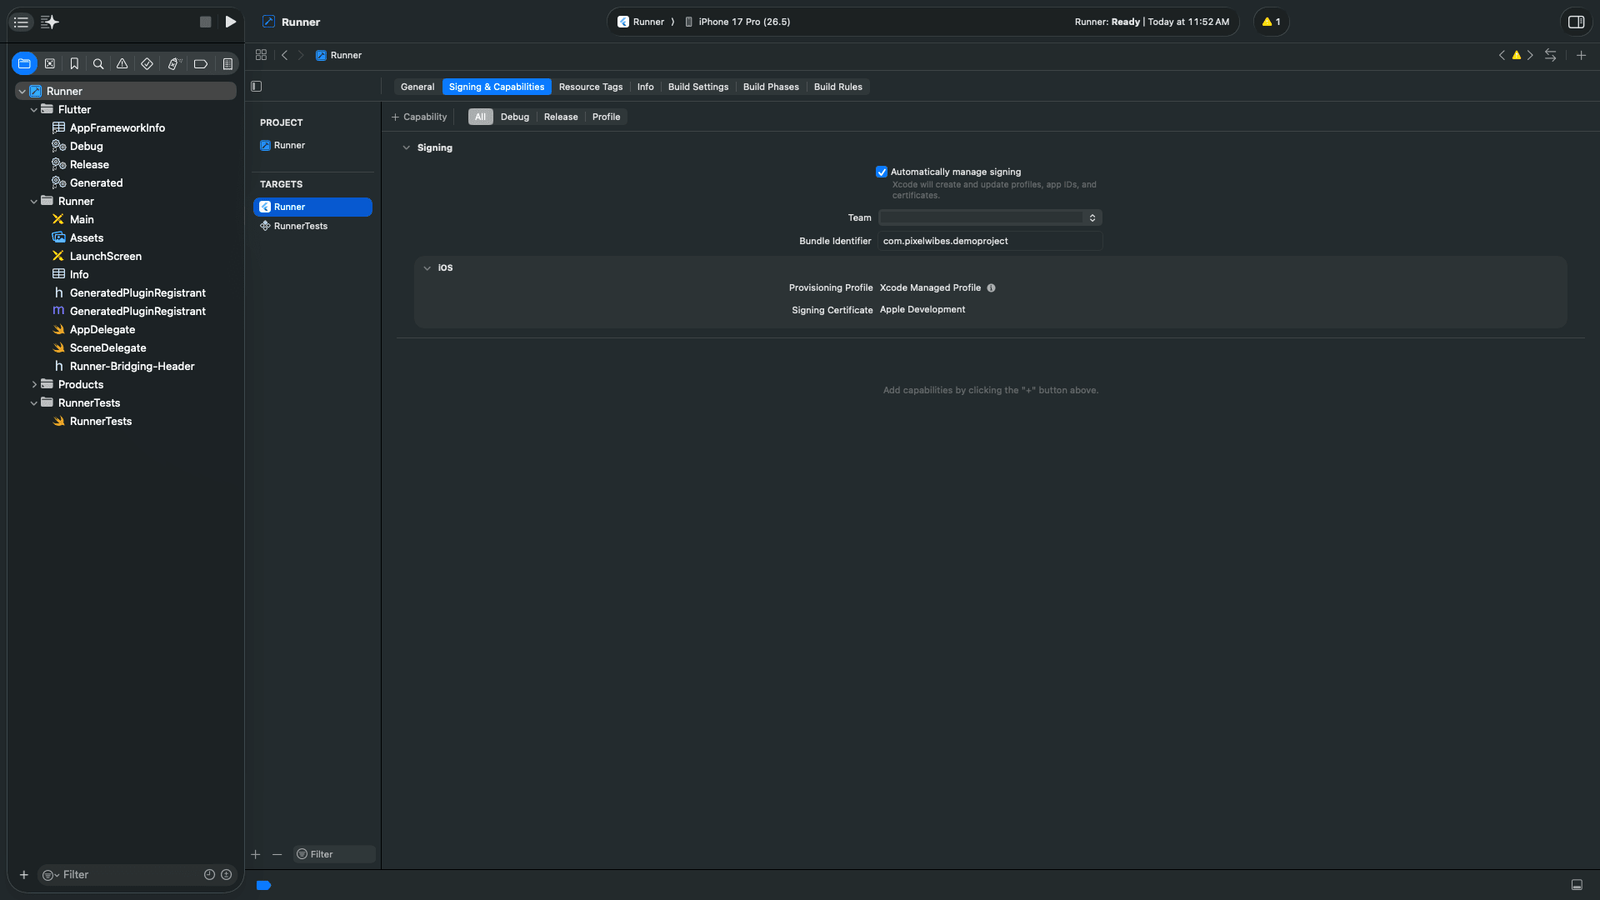
- Open the ios folder in Xcode
- Select Runner target
- Go to Signing & Capabilities
- Sign in using Apple Developer account
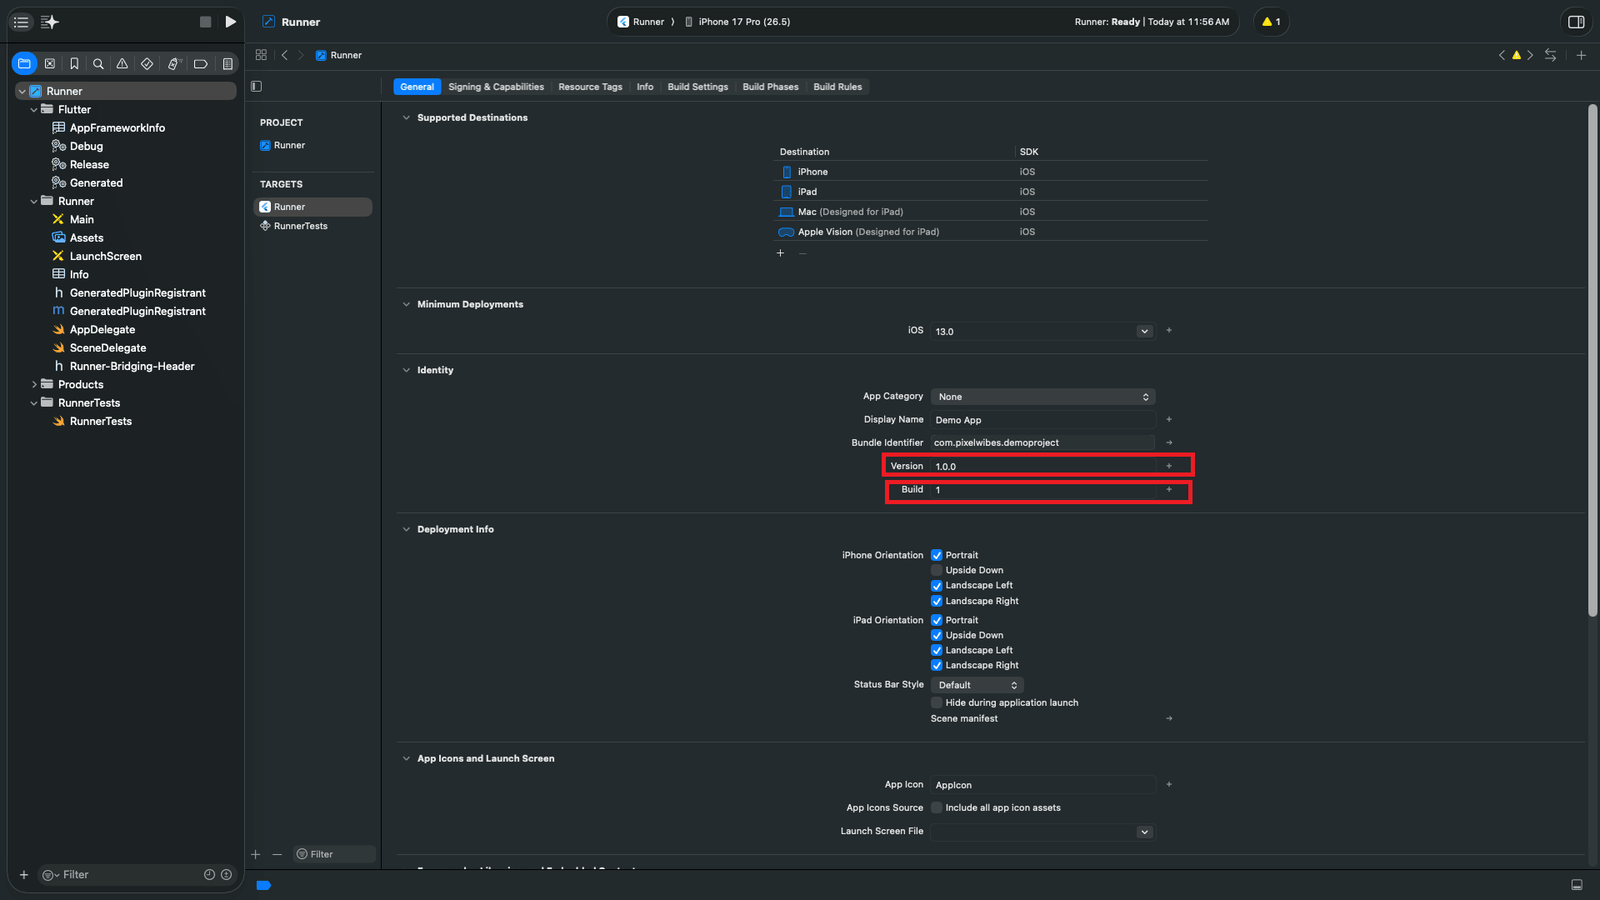
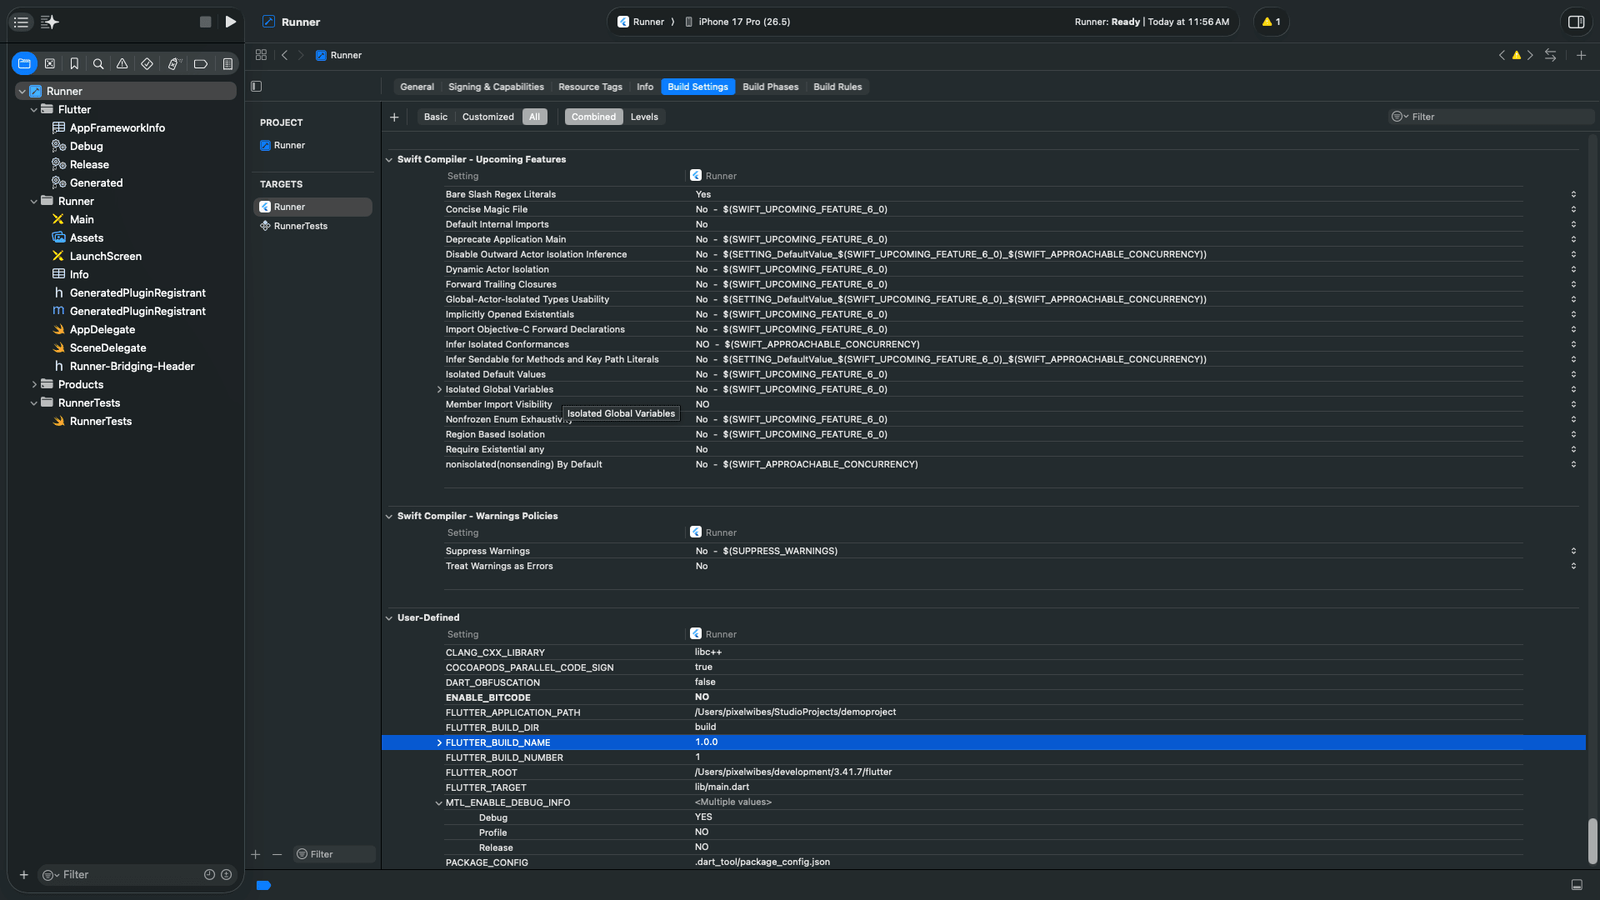
Update Build Version
- Update version and build number
- Update
FLUTTER_BUILD_NAME
- Update
FLUTTER_BUILD_NUMBER
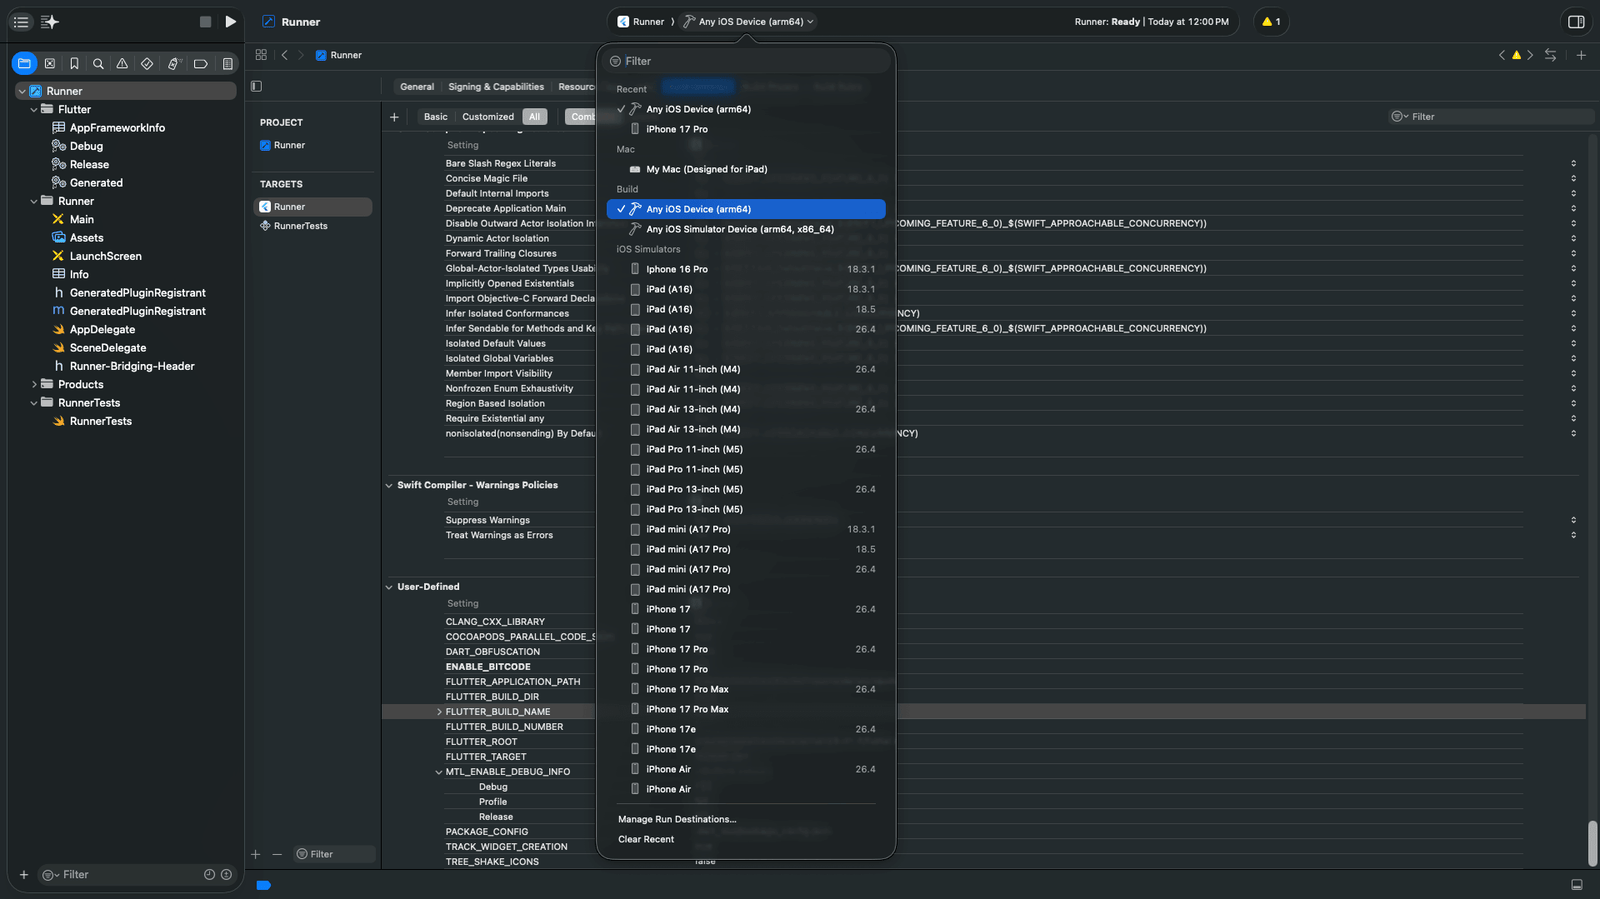
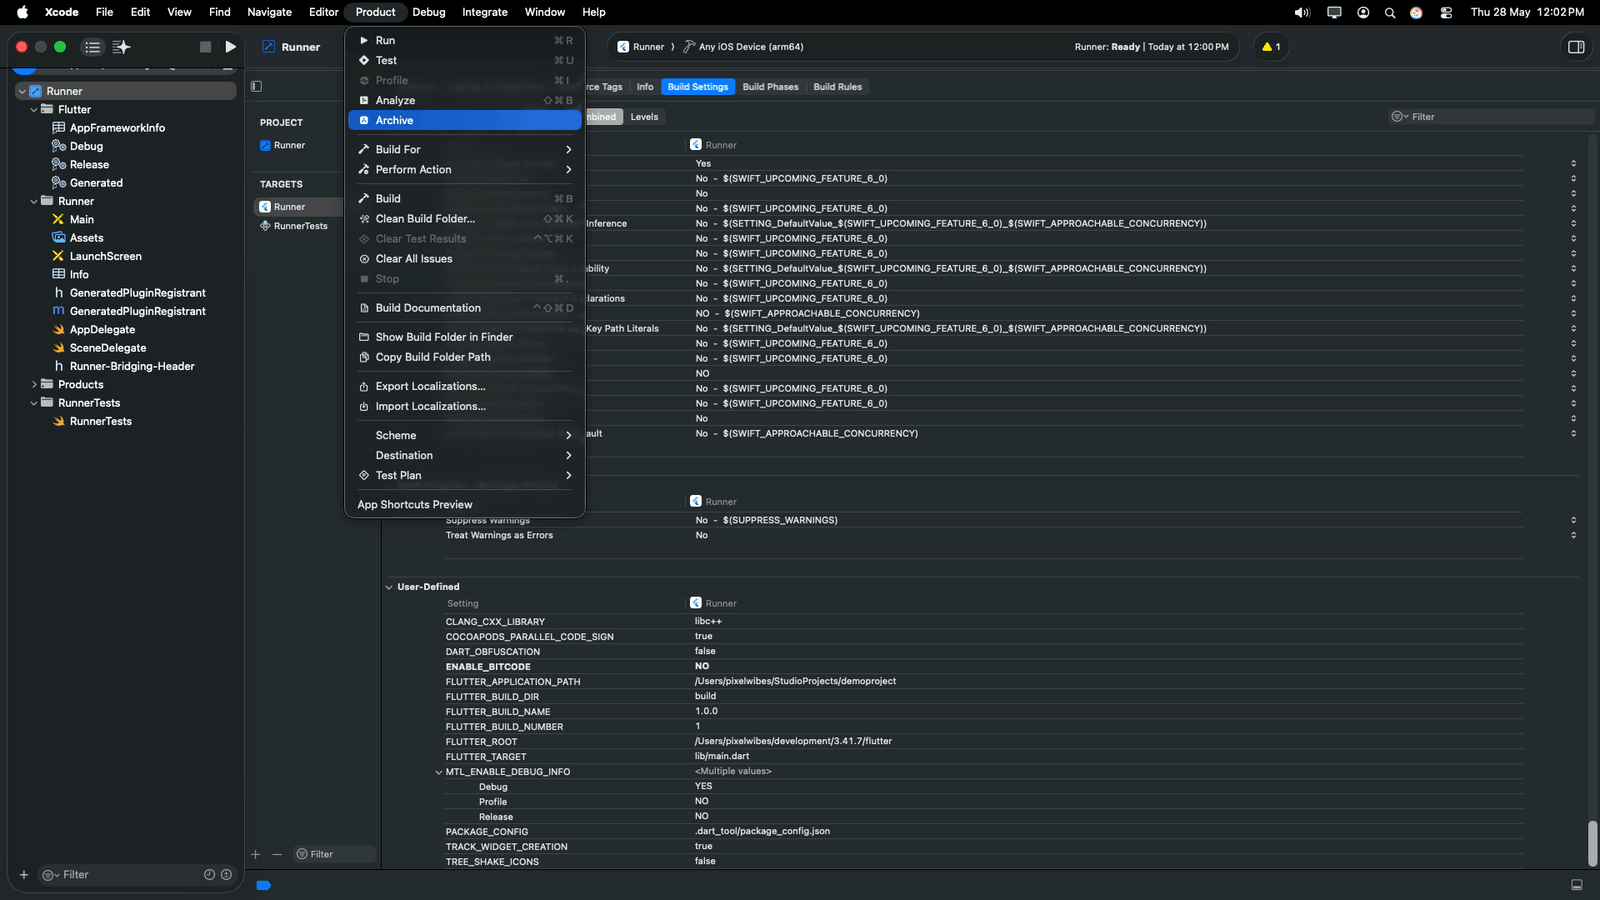
Archive Application
- Select Any iOS Device as target
- Go to Product → Archive
- Wait for archive process completion
- Upload build to App Store Connect
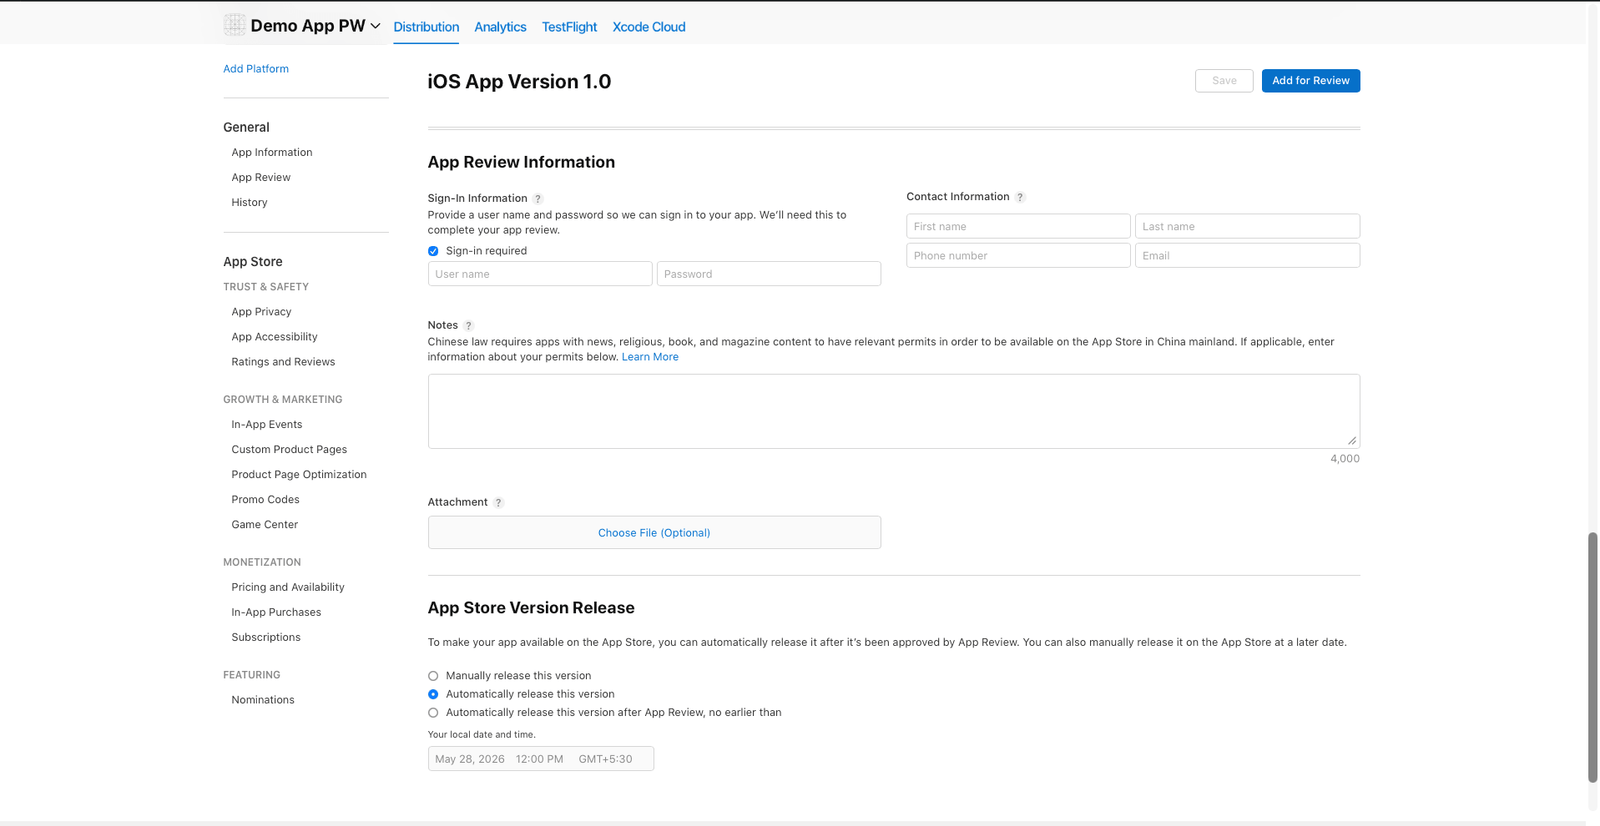
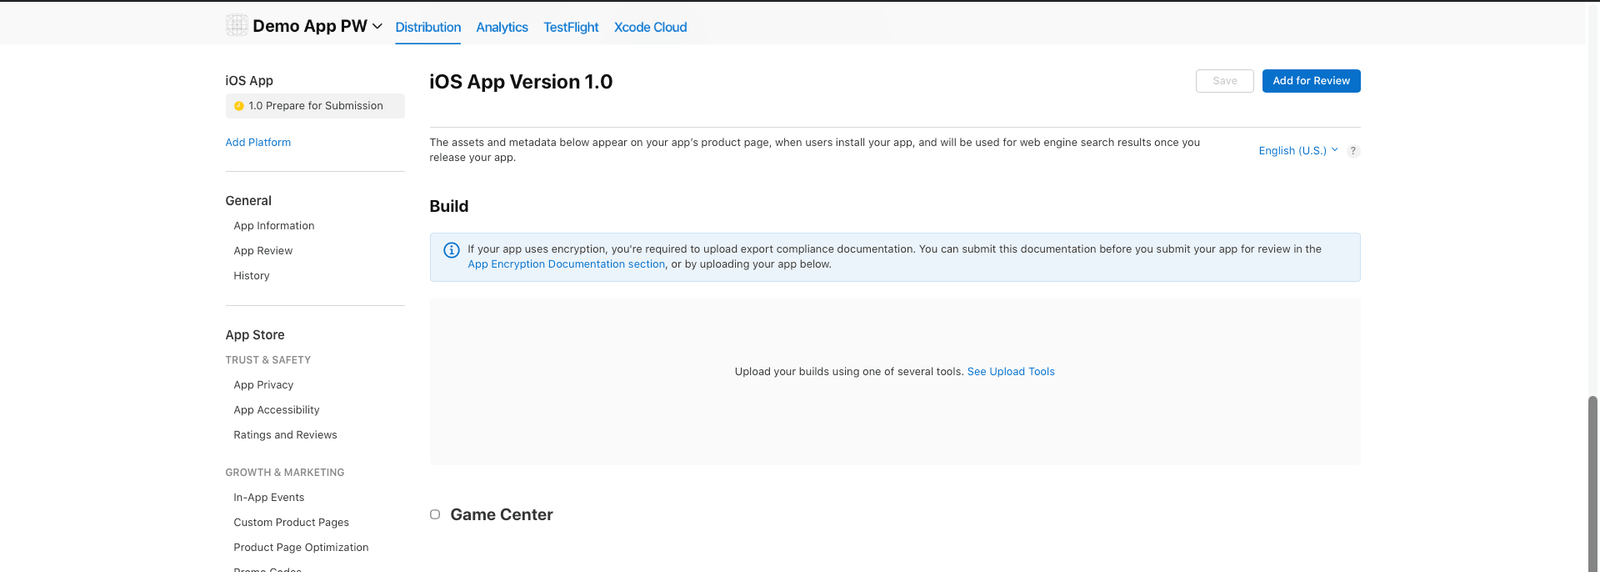
Submit for Review
- Open App Store Connect
- Select uploaded build
- Click Add for Review
- Submit application for App Store review
Step 8: Post-Release Tasks
- Monitor application performance
- Track user feedback and ratings
- Address bug reports
- Plan future updates
- Maintain App Store compliance
Important Notes
- Keep certificates and provisioning profiles secure
- Ensure your application complies with App Store Guidelines
- Test the application thoroughly before submission
- Keep application version numbers updated
- Monitor App Store review status regularly
- Back up all signing certificates and profiles
Troubleshooting
Common issues and solutions you may encounter
during iOS deployment and App Store submission.
Build Fails
- Check Flutter version compatibility
- Update project dependencies
- Verify installed Xcode version
- Check signing configuration
- Validate Bundle Identifier
Upload Issues
- Verify certificates and provisioning profiles
- Check application version number
- Validate screenshots and visual assets
- Confirm application bundle size
- Check API compatibility requirements
Review Rejection
- Read rejection reasons carefully
- Make necessary application changes
- Update compliance and policy issues
- Resubmit updated application build
Need Help?
If you encounter issues during deployment,
refer to the following resources:
Remember:
First-time iOS deployment and App Store review
may take longer. Future updates and releases
are generally processed faster.
Need Help?
Feel free to contact our support team for any issues, questions, or
guidance.
Support Policy
Scope of Support
- Installation assistance
- Bug fixing & issue resolution
- Basic guidance on features
Not Included:
- Custom feature development
- Code modifications or customization
- Server configuration or hosting issues
- Third-party integrations or services
Support
Your feedback helps us improve XpressHive.
If you have suggestions, feature requests, or ideas, feel free to share them with
us.